Featured Image: A split-screen comparison…

Smart Sensors vs. Traditional Growing: Measuring the Difference
Featured Image: A split-screen comparison showing a traditional garden plot with basic tools (watering can, soil thermometer, simple pH test strips) on one side, and a high-tech growing setup with digital sensors, smartphone monitoring, and automated systems on the other. Plants should be thriving in both setups to show this isn’t about technology replacement but enhancement.
The agricultural world stands at a fascinating crossroads where traditional farming wisdom meets cutting-edge sensor technology. While experienced growers have successfully cultivated crops for thousands of years using observation, intuition, and hard-earned knowledge, modern smart sensors promise to quantify and optimize what was once purely experiential. The question isn’t whether technology should replace traditional methods, but rather how the marriage of both approaches can create superior growing outcomes.
This comprehensive analysis examines the measurable differences between traditional growing methods and sensor-enhanced cultivation, providing data-driven insights into when each approach excels and how they can work together to achieve optimal results.
The Traditional Growing Approach
Traditional growing relies on human senses, experience, and established agricultural practices developed over generations. Skilled growers assess plant health through visual inspection, soil moisture by feel, and timing by seasonal patterns and plant behavior.
Strengths of Traditional Methods
Holistic Plant Assessment: Experienced growers observe subtle changes in plant color, leaf position, growth rate, and overall vigor that sensors cannot yet quantify.
Intuitive Problem Solving: Years of experience enable pattern recognition that identifies problems before they become measurable by instruments.
Cost Effectiveness: No equipment investment, maintenance, or calibration requirements reduce operational overhead.
Adaptability: Human judgment can adapt to unique situations and make decisions based on incomplete information.
Integrated Decision Making: Traditional growers consider multiple factors simultaneously – weather patterns, seasonal changes, market timing, and resource availability.
Limitations of Traditional Approaches
Subjectivity: Individual interpretation varies, leading to inconsistent results between different growers or even the same grower on different days.
Limited Precision: Human senses can only detect changes within certain thresholds, missing subtle but important variations.
Experience Dependency: New growers lack the accumulated knowledge needed for optimal decision-making.
Time Intensive: Manual monitoring requires significant time investment for large operations.
Reactive Management: Problems are often addressed after symptoms become visible rather than being prevented.
The Smart Sensor Revolution
Smart sensors provide continuous, quantified monitoring of growing conditions, enabling data-driven decision making and automated responses to changing conditions.
Key Sensor Technologies
Soil Moisture Sensors: Measure volumetric water content with ±2% accuracy, enabling precise irrigation timing.
Temperature and Humidity Sensors: Monitor air and soil temperature with 0.1°C precision and relative humidity within 2% accuracy.
Light Sensors: Measure photosynthetically active radiation (PAR) in μmol/m²/s for optimal lighting decisions.
pH and EC Sensors: Continuously monitor soil or solution chemistry with laboratory-grade precision.
CO2 Sensors: Track atmospheric carbon dioxide levels for photosynthesis optimization.
Plant-Based Sensors: Monitor stem diameter, leaf thickness, and sap flow for direct plant stress measurement.
Advantages of Sensor-Based Growing
Objective Data: Quantified measurements eliminate guesswork and provide consistent, repeatable results.
Continuous Monitoring: 24/7 data collection captures changes that might be missed during periodic manual checks.
Early Problem Detection: Sensors detect problems before visual symptoms appear, enabling preventive action.
Optimization Capability: Data analysis reveals optimal growing conditions for specific crops and varieties.
Automated Response: Systems can automatically adjust irrigation, heating, cooling, and lighting based on sensor inputs.
Scalability: Sensor networks can monitor large areas with minimal human intervention.
Data Historical Analysis: Long-term data collection enables trend analysis and predictive modeling.
Comparative Performance Analysis
Water Management Comparison
Traditional Method Results:
- Water usage: 100% baseline
- Irrigation frequency: Daily or as needed based on visual/tactile assessment
- Plant stress incidents: 15-25% of growing cycle
- Water waste: 20-40% due to over-watering
Sensor-Enhanced Results:
- Water usage: 25-40% reduction through precision timing
- Irrigation frequency: Optimized based on actual plant needs
- Plant stress incidents: 5-10% reduction
- Water waste: 60-80% reduction
Key Finding: Soil moisture sensors consistently reduce water usage by 25-40% while maintaining or improving plant health by eliminating both under and over-watering conditions.
Nutrient Management Efficiency
Traditional Approach:
- Fertilizer application: Schedule-based or symptom-reactive
- Nutrient deficiency detection: 7-14 days after onset
- Fertilizer waste: 30-50% due to imprecise timing
- Plant recovery time: 10-21 days after treatment
Sensor-Monitored Approach:
- Fertilizer application: Need-based with precise timing
- Nutrient deficiency detection: 2-5 days earlier than visual symptoms
- Fertilizer waste: 40-60% reduction through precision application
- Plant recovery time: 5-10 days due to early intervention
Environmental Control Precision
Traditional Environmental Management:
- Temperature control: ±5-8°F variation from optimal
- Humidity management: ±15-20% RH variation
- Light management: Seasonal dependence with limited supplementation
- Response time: 30-60 minutes to environmental changes
Sensor-Controlled Environment:
- Temperature control: ±1-2°F precision
- Humidity management: ±5% RH precision
- Light management: Optimal PAR levels maintained continuously
- Response time: 5-15 minutes automated response
Yield and Quality Comparisons
Productivity Metrics:
Leafy Greens Production Study (12-month comparison):
Traditional Growing:
- Average yield: 2.3 lbs/sq ft/month
- Crop loss rate: 12-18%
- Quality consistency: 75-80%
- Time to harvest: 35-45 days
Sensor-Enhanced Growing:
- Average yield: 3.1 lbs/sq ft/month (35% increase)
- Crop loss rate: 6-9% (50% reduction)
- Quality consistency: 90-95%
- Time to harvest: 28-35 days (20% faster)
Economic Impact Analysis
Initial Investment Comparison
Traditional Setup Costs (1,000 sq ft greenhouse):
- Basic tools and equipment: $500-800
- Manual irrigation system: $300-500
- Basic monitoring tools: $100-200
- Total initial investment: $900-1,500
Smart Sensor Setup Costs:
- Sensor network (10-15 nodes): $2,500-4,000
- Automated irrigation system: $1,500-2,500
- Environmental controls: $2,000-3,500
- Software and monitoring: $500-1,000
- Total initial investment: $6,500-11,000
Operating Cost Analysis
Annual Operating Costs (Traditional):
- Water and utilities: $2,400/year
- Fertilizers and amendments: $800/year
- Labor (monitoring and adjustments): $3,600/year
- Crop losses: $1,200/year
- Total annual costs: $8,000
Annual Operating Costs (Sensor-Enhanced):
- Water and utilities: $1,440/year (40% reduction)
- Fertilizers and amendments: $480/year (40% reduction)
- Labor (reduced monitoring): $1,800/year (50% reduction)
- Crop losses: $600/year (50% reduction)
- Sensor maintenance: $300/year
- Total annual costs: $4,620
Return on Investment Calculation
Annual Savings: $8,000 – $4,620 = $3,380
Additional Investment: $6,500-11,000 – $900-1,500 = $5,600-9,500
Payback Period: 1.7-2.8 years
5-Year ROI: 178-302%
Crop-Specific Performance Differences
Microgreens Production
Traditional Method:
- Germination rate: 80-85%
- Days to harvest: 8-12 days
- Yield per tray: 6-8 oz
- Quality grade: Good to Very Good
Sensor-Optimized Method:
- Germination rate: 92-96%
- Days to harvest: 7-10 days
- Yield per tray: 8-12 oz
- Quality grade: Excellent
Herb Production
Traditional Growing:
- Essential oil content: Baseline 100%
- Harvest frequency: Every 3-4 weeks
- Plant longevity: 3-4 months
- Disease incidence: 15-20%
Sensor-Enhanced Growing:
- Essential oil content: 15-25% higher
- Harvest frequency: Every 2-3 weeks
- Plant longevity: 4-6 months
- Disease incidence: 5-8%
Integration Strategies: Best of Both Worlds
The Hybrid Approach
The most successful modern growing operations combine traditional expertise with sensor technology, using each approach where it excels most:
Sensors Excel At:
- Continuous environmental monitoring
- Precise resource management
- Early problem detection
- Data logging and analysis
- Automated routine adjustments
Traditional Skills Excel At:
- Overall plant health assessment
- Complex problem diagnosis
- Seasonal planning and strategy
- Quality evaluation
- Creative problem-solving
Implementation Strategy
Phase 1: Foundation Sensors
- Install basic soil moisture and temperature sensors
- Implement automated irrigation based on soil moisture
- Maintain traditional monitoring for plant health assessment
- Cost: $1,000-2,000 for small operations
Phase 2: Environmental Control
- Add humidity, light, and air temperature sensors
- Implement climate control automation
- Continue visual monitoring for quality control
- Cost: Additional $2,000-3,500
Phase 3: Advanced Analytics
- Integrate plant-based sensors for direct stress monitoring
- Implement predictive analytics and machine learning
- Use traditional expertise to interpret and act on data insights
- Cost: Additional $3,000-5,000
Practical Implementation Guidelines
For Small-Scale Growers
Start Simple: Begin with soil moisture sensors and basic environmental monitoring.
Focus on High-Impact Areas: Prioritize sensors that address your biggest challenges (usually water management).
Maintain Manual Backup: Keep traditional tools and skills as backup systems.
Budget Gradually: Spread sensor investment over 2-3 years to manage cash flow.
For Commercial Operations
Comprehensive Planning: Design integrated sensor networks from the beginning.
Staff Training: Train employees to use both traditional skills and sensor data.
Data Management: Invest in software systems to analyze and act on sensor data.
Redundancy: Maintain backup systems for critical monitoring functions.
Common Implementation Challenges
Technical Challenges
Sensor Calibration: Requires regular maintenance and calibration for accurate readings.
Connectivity Issues: Wireless sensors can have communication problems in large facilities.
Data Overload: Too much data can be overwhelming without proper analysis tools.
Integration Complexity: Connecting different sensor systems can be technically challenging.
Human Factors
Learning Curve: Staff need training to interpret and act on sensor data effectively.
Over-Reliance Risk: Complete dependence on sensors can lead to problems when systems fail.
Cost Justification: Initial investment can be difficult to justify without clear ROI analysis.
The Future of Growing: AI and Predictive Analytics
The next evolution combines sensor data with artificial intelligence to predict plant needs and optimize growing conditions proactively:
Predictive Modeling: AI analyzes historical sensor data to predict optimal harvest timing, disease outbreaks, and resource needs.
Automated Decision Making: Systems make complex decisions about nutrition, irrigation, and environmental control without human intervention.
Continuous Learning: AI systems improve over time, learning from each growing cycle to optimize future performance.
Integration with Market Data: Predictive systems consider market conditions and pricing to optimize production timing.
Making the Decision: When to Adopt Sensor Technology
Adopt Sensors When:
- Managing more than 500 sq ft of growing space
- Resource costs (water, energy, nutrients) are significant
- Crop losses exceed 10% regularly
- Labor costs for monitoring are substantial
- Consistency and quality are critical for market success
Stick with Traditional Methods When:
- Growing diverse, small-scale operations
- Initial investment capital is extremely limited
- Technical support and maintenance aren’t readily available
- Local markets don’t reward consistency with premium pricing
Success Metrics and Monitoring
To measure the success of sensor integration:
Production Metrics:
- Yield per square foot per month
- Crop loss percentage
- Time to harvest
- Quality consistency scores
Resource Efficiency:
- Water usage per pound of production
- Energy consumption per harvest cycle
- Fertilizer cost per pound of yield
- Labor hours per production unit
Financial Performance:
- Revenue per square foot
- Operating cost reduction
- Return on sensor investment
- Market premium capture
Conclusion: The Path Forward
The comparison between smart sensors and traditional growing methods reveals not a competition, but an evolution. Sensor technology doesn’t replace the need for agricultural knowledge and experience – it amplifies and quantifies it.
Key Findings:
- Sensor-enhanced growing delivers 25-40% resource savings
- Yields increase by 20-35% with sensor optimization
- Quality consistency improves by 15-20%
- ROI is achieved within 2-3 years for most operations
- The hybrid approach combining both methods produces optimal results
The most successful growers of the future will be those who master both traditional agricultural wisdom and modern sensor technology, using each approach where it provides the greatest advantage. Traditional skills provide the foundation and context, while sensors provide the precision and optimization needed for modern competitive agriculture.
As sensor costs continue to decrease and capabilities increase, the question isn’t whether to adopt this technology, but rather how quickly and effectively it can be integrated with existing expertise. The farms that thrive in the coming decades will be those that successfully blend the art and science of growing, creating systems that are both highly productive and deeply rooted in agricultural understanding.
The future of agriculture lies not in choosing between tradition and technology, but in the intelligent integration of both approaches to create growing systems that are more productive, sustainable, and profitable than either could achieve alone.
NFT Systems Explained: Building Your First Nutrient Film Technique Setup
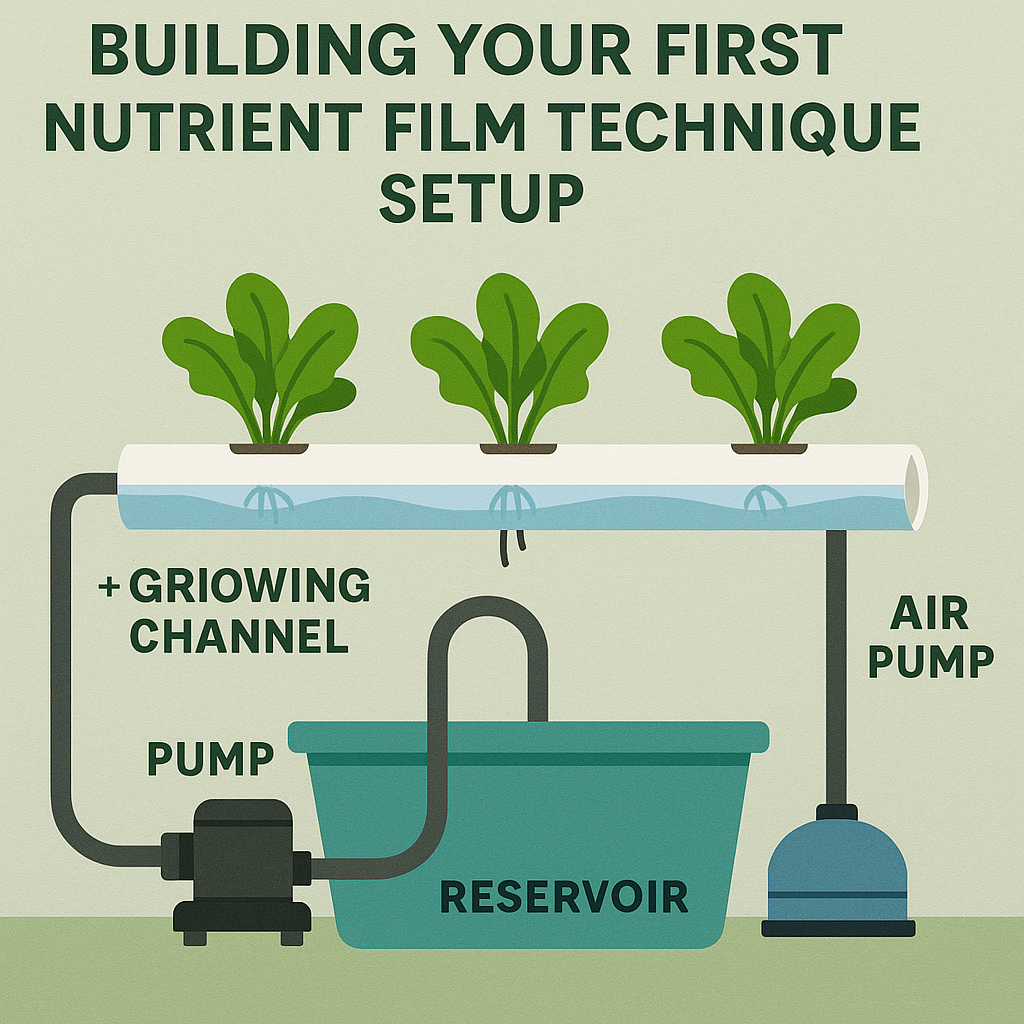
Featured Image: A clean, professional NFT hydroponic system showing white PVC channels with healthy lettuce and herb plants growing in neat rows. Include a visible nutrient reservoir, pump system, and return drainage system. The setup should appear in a greenhouse environment with good lighting.
Nutrient Film Technique (NFT) represents one of the most elegant solutions in hydroponic growing – a continuous flow system that delivers precisely the right amount of water and nutrients while maintaining optimal oxygen levels at the root zone. For growers seeking efficient, scalable, and productive hydroponic systems, NFT offers compelling advantages combined with relatively simple construction and maintenance requirements.
Developed in the 1960s by Dr. Allan Cooper at the Glasshouse Crops Research Institute in England, NFT has become a cornerstone of commercial hydroponic production worldwide. Its success lies in the perfect balance of nutrient delivery, oxygenation, and resource efficiency.
How NFT Systems Work
The fundamental principle of NFT is elegantly simple: a thin film of nutrient solution continuously flows through slightly sloped channels, providing plant roots with constant access to water, nutrients, and oxygen. Unlike deep water culture systems where roots are submerged, or drip systems with intermittent feeding, NFT provides continuous, gentle delivery of everything plants need.
The NFT Process:
1. Nutrient Delivery: A pump draws nutrient solution from a reservoir and delivers it to the higher end of growing channels.
2. Film Flow: The solution flows as a thin film (2-3mm deep) along the bottom of sloped channels, contacting plant roots.
3. Root Interaction: Plant roots absorb nutrients and water while maintaining access to oxygen in the air space above the film.
4. Solution Return: Used nutrient solution flows to the lower end of channels and returns to the reservoir for recirculation.
5. Continuous Cycle: The process repeats continuously, providing plants with consistent nutrition and hydration.
Advantages of NFT Systems
Water Efficiency: NFT systems use 80-90% less water than traditional soil growing by recycling nutrient solution continuously.
Nutrient Control: Precise control over nutrient concentration and pH allows for optimal plant nutrition throughout growth cycles.
Oxygenation: The thin film design ensures roots receive excellent oxygen levels, promoting healthy growth and preventing root rot.
Space Efficiency: Vertical growing capability and compact design maximize production per square foot.
Clean Growing: Soilless system eliminates soil-borne pests and diseases while producing clean, easy-to-harvest crops.
Scalability: Systems can be easily expanded by adding more channels or levels.
Resource Efficiency: Recirculating design minimizes nutrient waste and reduces fertilizer costs.
System Components and Design
Growing Channels
Channel Material: Food-grade PVC, ABS plastic, or purpose-built NFT channels. Standard sizes range from 4-6 inches wide.
Channel Design: Rectangular or round channels with removable lids containing net pot holes spaced 4-8 inches apart depending on crop requirements.
Slope Requirements: Channels must slope 1:30 to 1:40 (approximately 1.5-2.5 degrees) to ensure proper flow without excessive speed.
Length Considerations: Maximum recommended length is 30-40 feet to prevent nutrient depletion and pH drift along the channel.
Reservoir System
Size Calculation: Reservoir capacity should equal 1-2 gallons per growing site to provide adequate buffer and system stability.
Material Selection: Food-grade plastic or fiberglass reservoirs with opaque walls to prevent algae growth.
Location: Position below growing channels to enable gravity return of nutrient solution.
Aeration: Air stones or venturi systems maintain dissolved oxygen levels in the reservoir.
Pump and Circulation
Pump Selection: Submersible or inline pumps sized to deliver 1 gallon per minute per 4-inch channel.
Flow Rate: Optimal flow creates a 2-3mm deep film – too little causes dry spots, too much drowns roots.
Distribution Manifold: PVC pipe system distributes nutrient solution evenly to all channels.
Return System: Gravity-fed collection channels return solution to reservoir with minimal pump requirement.
Support Structure
Frame Construction: Sturdy framework supporting channels at proper slope with allowance for plant weight.
Level Adjustment: Adjustable legs or shims enable precise slope calibration.
Material Options: PVC pipe, aluminum extrusion, or steel construction depending on scale and permanence.
Building Your First NFT System
Planning and Design
Space Assessment: Measure available growing space and determine channel layout for maximum efficiency.
Crop Selection: Choose appropriate crops for your first system – leafy greens and herbs are ideal for beginners.
Scale Decision: Start with 4-6 channels to learn the system before expanding to commercial scale.
Component Sourcing: Create detailed parts list including channels, fittings, pump, reservoir, and monitoring equipment.
Construction Process
Step 1: Frame Assembly
- Build support frame with proper slope (1:30 to 1:40)
- Ensure structural stability for plant and water weight
- Install adjustable legs for fine-tuning slope
- Test frame level and stability before proceeding
Step 2: Channel Installation
- Mount channels on frame with consistent spacing
- Verify proper slope using a level and measuring tape
- Install end caps and drainage fittings
- Cut holes for net pots according to crop spacing requirements
Step 3: Plumbing System
- Install reservoir below channel level
- Connect pump to distribution manifold
- Install individual feed lines to each channel
- Create return collection system to reservoir
- Test all connections for leaks
Step 4: Control Systems
- Install timer for pump cycling (typically continuous operation)
- Add EC and pH monitoring equipment
- Install temperature monitoring for solution and air
- Set up aeration system for reservoir
System Testing
Flow Testing: Run system with plain water to verify proper flow rates and distribution.
Leak Detection: Check all connections and joints for leaks before adding nutrients.
Level Verification: Confirm channels maintain proper slope and film thickness.
Control Calibration: Calibrate pH and EC meters using standard solutions.
Nutrient Management in NFT
Solution Preparation
Base Nutrients: Use complete hydroponic fertilizers designed for recirculating systems.
Concentration Levels: Maintain EC between 1.8-2.4 mS/cm for most leafy greens and herbs.
pH Management: Keep pH between 5.5-6.5 for optimal nutrient uptake.
Water Quality: Start with low-EC water (under 0.4 mS/cm) for consistent results.
Monitoring and Adjustment
Daily Checks: Monitor EC, pH, and solution level daily during active growing periods.
Weekly Analysis: Conduct more detailed testing of individual nutrients if problems arise.
Solution Replacement: Replace entire solution every 2-3 weeks or when EC drops significantly.
Record Keeping: Maintain logs of all adjustments and plant responses for system optimization.
Crop Selection and Management
Ideal NFT Crops
Leafy Greens:
- Lettuce varieties (butterhead, romaine, leaf lettuce)
- Spinach and baby spinach
- Kale and Asian greens
- Swiss chard and beet greens
Herbs:
- Basil (all varieties)
- Cilantro and parsley
- Oregano and thyme
- Mint and lemon balm
Specialty Crops:
- Microgreens for quick turnaround
- Baby vegetables for premium markets
- Edible flowers in controlled environments
Planting and Spacing
Propagation: Start plants in rockwool cubes or similar inert media.
Transplant Timing: Move to NFT system when roots are 1-2 inches long.
Spacing Guidelines:
- Lettuce: 6-8 inches apart
- Herbs: 4-6 inches apart
- Leafy greens: 4-8 inches depending on mature size
Common Problems and Solutions
Flow-Related Issues
Uneven Flow:
- Cause: Improper channel slope or distribution
- Solution: Readjust channel level and check manifold design
Flow Blockages:
- Cause: Root growth blocking channels or debris accumulation
- Solution: Regular channel cleaning and root management
Insufficient Flow:
- Cause: Undersized pump or system leaks
- Solution: Upgrade pump capacity or repair leaks
Plant Health Issues
Nutrient Deficiencies:
- Cause: Incorrect EC levels or pH imbalance
- Solution: Adjust nutrient concentration and pH
Root Problems:
- Cause: Poor oxygenation or excessive moisture
- Solution: Improve aeration and check flow rates
Slow Growth:
- Cause: Inadequate lighting or temperature issues
- Solution: Optimize environmental conditions
System Maintenance
Regular Cleaning: Clean channels and reservoir between crops to prevent disease buildup.
Pump Maintenance: Check pump performance and clean intake screens regularly.
Monitor Replacement: Calibrate and replace pH/EC probes according to manufacturer schedules.
Scaling Up Your NFT Operation
Commercial Considerations
Production Planning: Calculate channel requirements based on harvest schedules and market demand.
Automation Options: Consider automated pH adjustment, nutrient dosing, and environmental controls.
Quality Control: Implement standardized procedures for consistency and food safety.
Economic Analysis: Track production costs, yields, and profitability per channel.
Advanced Features
Multi-Zone Systems: Separate channels for different crops or growth stages.
Vertical Growing: Stack channels to maximize production per square foot.
Climate Integration: Connect NFT controls with greenhouse environmental systems.
Data Logging: Monitor and record system performance for optimization.
Economic Benefits of NFT
Initial Investment: Moderate startup costs compared to other hydroponic systems.
Operating Efficiency: Low water and nutrient consumption reduce ongoing costs.
Labor Savings: Clean growing conditions and easy harvesting reduce labor requirements.
Yield Advantages: Higher yields per square foot than soil growing in most applications.
Year-Round Production: Continuous harvesting capability maximizes facility utilization.
Getting Started with NFT
For growers new to NFT systems:
Start Small: Build a 4-6 channel system to learn before investing in larger installations.
Choose Simple Crops: Begin with lettuce or herbs rather than complex fruiting crops.
Focus on Fundamentals: Master flow rates, nutrient management, and pH control before adding complexity.
Keep Records: Document everything to identify patterns and optimize performance.
Connect with Community: Join hydroponic growing groups for advice and troubleshooting support.
NFT systems offer an excellent entry point into commercial hydroponic production, combining simplicity with scalability. While the initial learning curve requires attention to detail, mastering NFT opens doors to efficient, profitable growing operations that can supply fresh, high-quality produce year-round.
The key to NFT success lies in understanding the relationship between flow, nutrition, and plant biology. When properly designed and managed, NFT systems provide the foundation for sustainable, productive hydroponic operations that can compete with any growing method for efficiency and quality.

Year-Round Growing in Vermont: Beating the Winter Challenge
Featured Image: A snow-covered Vermont landscape with a glowing greenhouse in the foreground, warm light emanating from inside showing lush green plants growing within. Steam visible from ventilation systems, creating a dramatic contrast between the cold exterior and thriving interior growing environment.
Vermont’s harsh winters have traditionally defined the limits of local food production, with most farms shutting down operations from November through March. However, innovative growers across the Green Mountain State are rewriting the rules of seasonal agriculture, proving that fresh, local production can thrive even when temperatures drop below zero.
The challenge is real: Vermont winters bring temperatures as low as -30°F, minimal daylight hours, and heating costs that can make or break a growing operation. Yet the rewards for successful year-round production are substantial – premium pricing, dedicated customer bases, and the satisfaction of providing fresh food when it’s needed most.
Understanding Vermont’s Winter Growing Environment
Vermont’s climate presents unique challenges that must be understood before attempting year-round production:
Temperature Extremes: Average winter temperatures range from 10-30°F, with frequent dips below zero. Heating costs can represent 40-60% of winter operating expenses.
Limited Daylight: December and January provide only 8-9 hours of daylight, with weak solar radiation. Natural light levels drop to 5-10% of summer intensity.
Snow Load: Vermont building codes require structures to withstand 40+ lbs/sq ft of snow load. Greenhouses must be engineered accordingly.
Energy Costs: Vermont electricity rates average $0.16-0.20/kWh, making efficient heating and lighting systems essential.
The Opportunity
Despite these challenges, winter growing in Vermont offers unique advantages:
Premium Market Pricing: Fresh, locally-grown produce commands 40-60% higher prices in winter months.
Reduced Competition: Fewer local producers means less market saturation and stronger customer relationships.
Consistent Restaurant Demand: Vermont’s year-round tourism industry creates steady demand for local products.
Extended Growing Season Revenue: Year-round production can double or triple annual farm revenue compared to seasonal operations.
Infrastructure Solutions for Cold Climate Growing
Greenhouse Design Optimization
Double-Wall Construction: Polycarbonate or double-layer poly houses provide R-values of 1.5-2.0, significantly reducing heat loss compared to single-wall structures.
Thermal Mass Integration: Water barrels, concrete floors, or stone walls absorb heat during the day and release it at night, moderating temperature swings.
Ground-to-Air Heat Exchangers: Underground tubes leverage stable ground temperatures (45-50°F at 6-foot depth) to pre-warm incoming air.
Proper Orientation: South-facing structures with steep roof angles maximize winter solar gain while minimizing snow accumulation.
Advanced Heating Systems
Radiant Floor Heating: Circulating warm water through floor-embedded tubing provides efficient, even heat distribution while warming root zones.
Biomass Heating: Wood chip or pellet boilers can reduce heating costs by 40-60% compared to propane or oil systems.
Heat Recovery Ventilation: Capturing heat from exhaust air and transferring it to incoming fresh air improves energy efficiency by 60-80%.
Zone Heating: Dividing greenhouse space into zones allows for crop-specific temperature management and energy conservation.
Energy Conservation Strategies
Thermal Curtains: Automated curtain systems can reduce heat loss by 30-40% during nighttime hours.
Perimeter Insulation: Insulating foundation walls and the first 2-3 feet of greenhouse walls dramatically reduces heat loss.
Air Sealing: Eliminating air leaks through caulking, weatherstripping, and proper construction techniques can reduce heating loads by 20-30%.
Crop Selection for Winter Success
Not all crops are suited for Vermont winter production. Successful winter growers focus on varieties that tolerate low light and cool temperatures while maintaining market appeal.
Optimal Winter Crops
Leafy Greens:
- Spinach: Cold-tolerant varieties like ‘Winter Bloomsdale’ thrive in 40-50°F conditions
- Kale: Extremely cold-hardy, actually improves in flavor after frost exposure
- Asian Greens: Bok choy, mizuna, and tatsoi excel in cool conditions
- Lettuce: Butterhead and romaine varieties selected for cold tolerance
Herbs:
- Parsley: Biennial herbs that maintain quality through winter
- Cilantro: Cool-season crop that bolts less frequently in winter
- Chives: Perennial herbs that continue producing through winter
- Oregano and Thyme: Mediterranean herbs that tolerate cool, dry conditions
Microgreens:
- Pea shoots: Fast-growing and cold-tolerant
- Sunflower greens: High-value crop with quick turnaround
- Radish microgreens: Spicy flavor appreciated in winter cuisine
Variety Selection Criteria
Cold Tolerance: Choose varieties specifically bred for low-temperature performance.
Low-Light Performance: Select cultivars that maintain quality under reduced light conditions.
Disease Resistance: Winter’s high humidity conditions favor disease development; resistant varieties are essential.
Market Demand: Focus on crops with proven winter market demand and premium pricing potential.
Lighting Solutions for Vermont Winters
Supplemental lighting becomes essential for maintaining production quality and timing during Vermont’s dark winter months.
LED Technology Advantages
Energy Efficiency: Modern LED systems provide 40-50% energy savings compared to HPS lighting.
Heat Management: LEDs produce less heat, reducing cooling costs and allowing closer placement to plants.
Spectrum Control: Full-spectrum LEDs can be tuned for specific growth phases and crop requirements.
Longevity: 50,000+ hour lifespans reduce replacement costs and maintenance.
Lighting Strategies
Photoperiod Extension: Adding 4-6 hours of supplemental light extends the effective day length during short winter days.
Light Intensity Supplementation: Boosting light levels to 200-400 μmol/m²/s maintains summer-like growth rates.
Targeted Spectrum: Red and blue wavelengths optimized for photosynthesis while minimizing energy consumption.
Zone Lighting: Providing light only where needed reduces energy costs and allows crop-specific optimization.
Managing Winter Production Challenges
Humidity Control
Winter growing creates high humidity conditions that can lead to disease problems:
Ventilation Management: Balancing fresh air exchange with heat conservation requires sophisticated control systems.
Dehumidification: Mechanical dehumidifiers may be necessary during periods of high humidity and low temperatures.
Air Circulation: Continuous air movement prevents stagnant conditions that promote fungal diseases.
Pest and Disease Management
Enclosed winter environments can harbor pest and disease problems:
Preventive Sanitation: Regular cleaning and disinfection protocols prevent problem establishment.
Beneficial Insects: Predatory mites and other beneficials can be maintained in heated environments.
Environmental Controls: Maintaining optimal temperature and humidity reduces plant stress and disease susceptibility.
Water Management
Temperature Considerations: Cold water can shock plant roots; water heating may be necessary.
Humidity Balance: Overwatering in winter conditions leads to root rot and humidity problems.
System Winterization: Preventing freeze damage to irrigation systems during extreme cold periods.
Economic Strategies for Winter Production
Cost Management
Energy Budgeting: Heating costs should be factored at $2-5 per square foot per month during peak winter.
Crop Selection: Focus on high-value crops that justify increased production costs.
Efficiency Investments: Energy-efficient equipment pays for itself through reduced operating costs.
Market Development
Restaurant Partnerships: Develop relationships with restaurants that appreciate consistent, high-quality local ingredients year-round.
Winter CSA Programs: Offer winter shares focused on storage crops supplemented with fresh greenhouse production.
Specialty Markets: Target health-conscious consumers willing to pay premium prices for fresh, local produce in winter.
Value-Added Products: Consider processing excess production into preserved goods to maximize revenue.
Technology Integration for Winter Success
Environmental Monitoring
Sensor Networks: Monitor temperature, humidity, light levels, and soil conditions continuously.
Automated Controls: Computer-controlled systems manage heating, ventilation, and lighting based on real-time conditions.
Data Logging: Historical data helps optimize systems and predict maintenance needs.
Remote Monitoring: Smartphone alerts allow immediate response to system problems.
Energy Management Systems
Smart Thermostats: Programmable controls optimize heating schedules based on production requirements.
Load Management: Coordinating electrical loads prevents demand spikes and reduces utility costs.
Renewable Integration: Solar panels and wind systems can offset winter energy consumption.
Success Stories from Vermont Growers
Several Vermont operations have proven that year-round production is not only possible but profitable:
Green Mountain Greens (Waterbury): This 2,500 sq ft greenhouse operation focuses on microgreens and baby leafy greens, maintaining production through Vermont winters using efficient LED lighting and biomass heating.
Vermont Hydroponic Produce (Waitsfield): Specializing in lettuce and herbs, this operation uses thermal curtains and radiant heating to maintain consistent production while managing energy costs.
Four Season Farm (Harborside, ME – similar climate): Eliot Coleman’s pioneering work with unheated greenhouses and row covers demonstrates that cold-hardy crops can be grown with minimal energy inputs.
Planning Your Winter Growing Operation
Phase 1: Assessment and Planning
Site Evaluation: Assess solar exposure, wind protection, and utility access.
Market Research: Identify potential customers and price points for winter produce.
Financial Planning: Calculate startup costs, operating expenses, and revenue projections.
Phase 2: Infrastructure Development
Greenhouse Construction: Build or retrofit structures for winter production.
Heating System Installation: Install efficient heating systems sized for Vermont conditions.
Lighting Setup: Add supplemental lighting for consistent production.
Phase 3: Production Testing
Crop Trials: Test varieties and growing methods before full-scale production.
System Optimization: Fine-tune environmental controls and growing protocols.
Market Development: Build customer relationships and establish sales channels.
Common Mistakes to Avoid
Underestimating Energy Costs: Heating costs can quickly overwhelm revenues if not properly planned.
Inadequate Insulation: Poor insulation leads to excessive energy consumption and poor growing conditions.
Wrong Crop Selection: Growing heat-loving crops in winter conditions leads to poor quality and low yields.
Insufficient Lighting: Underestimating light requirements results in slow growth and poor plant quality.
Poor Ventilation: Inadequate air exchange creates disease-promoting conditions.
The Future of Winter Growing in Vermont
As technology improves and energy costs stabilize, year-round growing in Vermont will become increasingly viable. Advances in LED efficiency, heating technology, and automation are making winter production more accessible to small and medium-scale operations.
Emerging Technologies:
- Heat pump systems optimized for greenhouse applications
- Advanced thermal storage systems
- AI-controlled environmental management
- Improved crop varieties bred for low-light conditions
Policy Support: Vermont’s commitment to local food systems and renewable energy creates opportunities for grants and incentives supporting year-round agriculture.
Getting Started
For growers considering year-round production in Vermont:
Start Small: Begin with a modest setup to learn the systems and understand costs before scaling up.
Focus on Efficiency: Invest in energy-efficient systems from the beginning – they pay for themselves quickly.
Develop Markets First: Establish customer relationships before ramping up production.
Plan for Maintenance: Winter systems require more maintenance; budget time and resources accordingly.
Network with Other Growers: Join local growing groups and learn from experienced winter producers.
Year-round growing in Vermont requires careful planning, significant investment, and attention to detail. However, for growers willing to embrace the challenge, it offers the opportunity to serve customers with fresh, local produce throughout the year while building a more resilient and profitable agricultural business.
The key to success lies in understanding Vermont’s unique climate challenges and designing systems that work with, rather than against, the natural environment. With proper planning and execution, Vermont’s harsh winters can become a competitive advantage rather than a limitation.

Microgreens 101: From Seed to Harvest in 7-14 Days
Featured Image: A professional-looking growing setup showing multiple trays of colorful microgreens at different stages of growth, from newly sprouted seeds to harvest-ready greens. Include measuring tools, pH meters, and harvest containers to show the professional approach.
Microgreens represent one of the most exciting opportunities in modern agriculture – combining rapid growth cycles, premium pricing, and year-round production potential. Whether you’re a home gardener looking to add fresh nutrition to your diet or an entrepreneur seeking a profitable agricultural venture, microgreens offer an accessible entry point into high-value crop production.
What Are Microgreens?
Microgreens are young, tender plants harvested just after their first true leaves develop, typically 7-14 days after germination. Unlike sprouts, which are harvested before true leaves emerge, microgreens are allowed to develop their first set of photosynthetic leaves, concentrating flavors and nutrients into these tiny powerhouses.
Research from the University of Maryland found that microgreens contain 4-6 times more nutrients than their mature counterparts, making them nutritional superstars despite their small size. Red cabbage microgreens, for example, contain 40 times more vitamin E and 6 times more vitamin C than mature red cabbage.
Most Popular Microgreen Varieties
Sunflower Microgreens: Nutty flavor, crunchy texture, high in protein and healthy fats. Ready in 7-10 days.
Pea Shoots: Sweet, crisp with a fresh pea flavor. Excellent for Asian cuisine applications. 7-14 days to harvest.
Radish Microgreens: Spicy kick similar to mature radishes but milder. Fast growing at 6-8 days.
Broccoli Microgreens: Mild broccoli flavor, high in sulforaphane. 8-12 days to harvest.
Arugula Microgreens: Peppery flavor, perfect for salads and garnishes. 7-10 days.
Basil Microgreens: Concentrated basil flavor, beautiful purple varieties available. 10-14 days.
Setting Up Your Microgreen Operation
Equipment Essentials
Growing Trays: Food-grade plastic trays (10″x20″ standard). You’ll need both solid trays (for water) and perforated trays (for drainage).
Growing Medium: Organic potting mix, coconut coir, or specialized microgreen mats. Avoid garden soil which can harbor harmful bacteria.
Seeds: Purchase seeds specifically labeled for microgreen production to ensure they haven’t been treated with chemicals.
Lighting: Natural sunlight works, but LED grow lights provide consistent results year-round. T5 fluorescent lights are also effective.
Water Supply: Clean, filtered water is crucial. Avoid heavily chlorinated tap water.
Environmental Requirements
Temperature: Most microgreens thrive at 65-75°F (18-24°C). Consistent temperature is more important than perfect temperature.
Humidity: Maintain 40-60% humidity. Too high leads to mold, too low causes poor germination.
Air Circulation: Gentle air movement prevents mold and strengthens stems.
Light: 12-16 hours of light daily once sprouts emerge. Start with low intensity and gradually increase.
Step-by-Step Growing Process
Day 1: Seeding
1. Pre-soak larger seeds (sunflower, peas) for 8-12 hours. Small seeds (broccoli, radish) don’t require soaking.
2. Add 1-2 inches of growing medium to your tray, level and lightly compress.
3. Mist the surface until evenly moist but not waterlogged.
4. Sprinkle seeds evenly across the surface. Aim for dense coverage without overlapping.
5. Mist seeds lightly and cover with another tray to create darkness.
Days 2-4: Germination (Blackout Phase)
Keep trays stacked in darkness to encourage strong stem development. Check daily and mist if the surface appears dry. Most seeds will germinate within 2-3 days.
Look for:
- Strong, white root development
- Stems beginning to push upward
- First leaves (cotyledons) starting to open
Days 4-7: Light Exposure
Once stems are 1-2 inches tall, remove the cover tray and place under lights. The cotyledons will turn green within hours of light exposure.
Watering transition: Begin bottom-watering by placing the perforated tray in a solid tray with water. This prevents mold and encourages root development.
Days 7-14: Growth and Harvest
Monitor daily growth and maintain consistent moisture. First true leaves will appear, indicating harvest readiness.
Harvest indicators:
- First true leaves are fully developed
- Plants are 1-3 inches tall (variety dependent)
- Strong, vibrant color
- Good structural integrity
Harvesting and Post-Harvest Handling
Harvesting Technique
Use sharp, clean scissors or a knife to cut stems about 1/4 inch above the growing medium. Harvest during the coolest part of the day (early morning) for best quality.
Quality Standards:
- No yellowing or damaged leaves
- Clean cut with no growing medium attached
- Uniform size and appearance
- Fresh, vibrant appearance
Storage and Packaging
Immediately after harvest, gently wash if needed and thoroughly dry using a salad spinner. Store in refrigerated conditions (38-40°F) with high humidity.
Storage containers:
- Clamshell containers for retail sales
- Bulk containers for restaurant sales
- Breathable packaging to prevent condensation
Properly handled microgreens maintain quality for 7-10 days post-harvest.
Common Problems and Solutions
Mold Issues
Symptoms: Fuzzy growth on stems or growing medium, musty odor.
Solutions:
- Improve air circulation
- Reduce humidity
- Ensure proper drainage
- Clean equipment between uses
Poor Germination
Causes: Old seeds, incorrect temperature, too wet or too dry conditions.
Solutions:
- Test seed viability before large batches
- Maintain consistent temperature
- Monitor moisture levels carefully
Leggy Growth
Symptoms: Tall, weak stems with small leaves.
Solutions:
- Increase light intensity
- Reduce temperature slightly
- Improve air circulation
Scaling Up: From Hobby to Business
Microgreens offer excellent scalability. Start with a few trays and gradually expand based on market demand and your production capabilities.
Production Planning:
- Weekly seeding schedule for continuous harvest
- Variety rotation based on market demand
- Seasonal adjustments for optimal growing conditions
Market Opportunities:
- High-end restaurants seeking local, fresh garnishes
- Health-conscious consumers at farmers markets
- Grocery stores with local produce sections
- Direct-to-consumer subscriptions
Economic Considerations
Microgreens command premium prices – typically $15-25 per pound wholesale and $25-40 per pound retail. With proper management, a 10×20 tray can yield 8-12 ounces of microgreens.
Cost breakdown per tray:
- Seeds: $0.50-$1.50
- Growing medium: $0.25-$0.50
- Labor: $1.00-$2.00
- Utilities: $0.25-$0.50
- Total: $2.00-$4.50
With yields of 8-12 ounces per tray and wholesale prices of $15-25/lb, gross margins can exceed 300-400%.
Next Steps
Start small with 2-3 varieties and focus on mastering the growing process before expanding. Keep detailed records of germination rates, yield per tray, and time to harvest for each variety.
Microgreens represent the perfect intersection of nutrition, profitability, and sustainability. With minimal space requirements and rapid growth cycles, they offer an accessible path into professional growing whether your goal is fresh food for your family or a thriving agricultural business.
The key to success lies in consistency, attention to detail, and understanding your market. Master these fundamentals, and you’ll discover why microgreens have become one of agriculture’s most exciting opportunities.
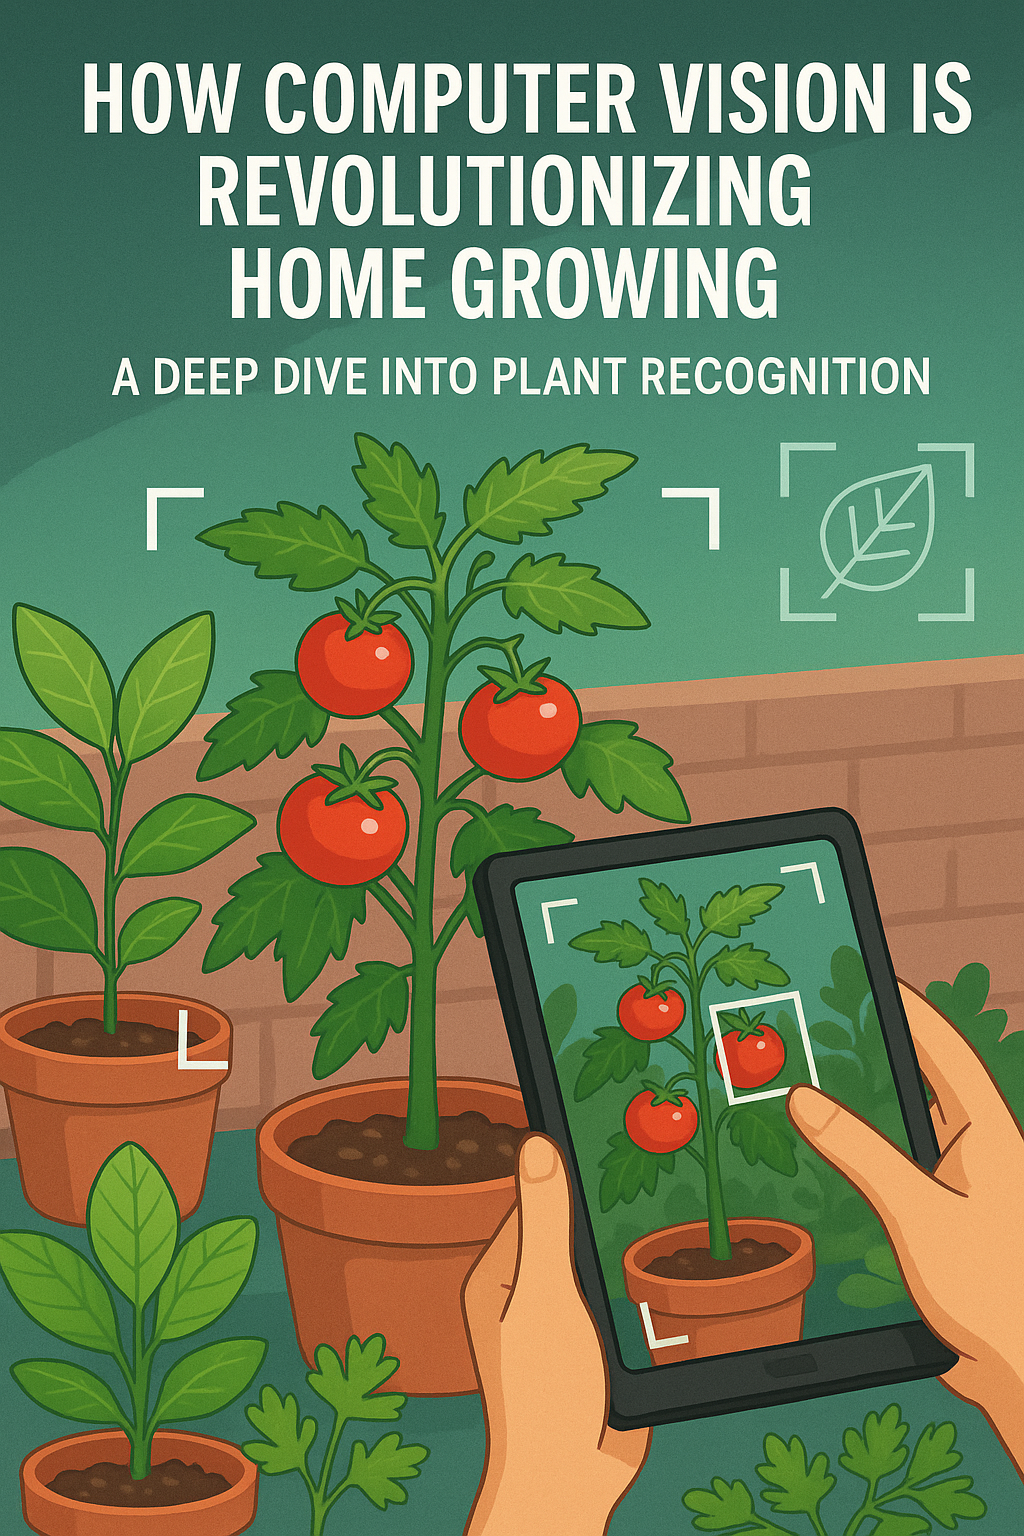
How Computer Vision is Revolutionizing Home Growing: A Deep Dive into Plant Recognition
The agricultural world is experiencing a technological revolution, and at the forefront of this change is computer vision technology. What was once the exclusive domain of large-scale commercial operations is now becoming accessible to home growers, fundamentally changing how we understand and care for our plants.
The Science Behind Plant Recognition
Computer vision in agriculture operates on the same principles that allow smartphones to recognize faces, but adapted for the unique challenges of plant identification. Modern agricultural AI systems use convolutional neural networks (CNNs) trained on millions of plant images to recognize species, growth stages, and health conditions with remarkable accuracy.
The process begins with image capture using specialized cameras that can detect both visible and near-infrared light spectrums. This multi-spectral approach provides far more information than the human eye can perceive, revealing plant stress, nutrient deficiencies, and disease symptoms before they become visually apparent.
Key Components of Plant Recognition Systems
Image Preprocessing: Raw images undergo filtering and enhancement to optimize them for analysis. This includes adjusting for lighting conditions, removing background noise, and standardizing image quality.
Feature Extraction: The AI identifies key characteristics such as leaf shape, color patterns, growth patterns, and structural features that differentiate one plant species from another.
Classification Algorithms: Machine learning models compare extracted features against trained databases to provide species identification and health assessments.
Real-World Applications for Home Growers
Modern plant recognition systems can identify over 500 common plant species with 95%+ accuracy. For home growers, this translates to immediate practical benefits:
Species Identification: Perfect for inherited gardens or identifying volunteer plants. Simply point your device at an unknown plant for instant identification.
Growth Stage Tracking: The system monitors plant development, providing optimal timing for transplanting, pruning, and harvesting activities.
Health Monitoring: Early detection of stress, disease, or nutrient deficiencies allows for proactive intervention before problems become severe.
The Technology Behind the Magic
Modern agricultural computer vision systems leverage several cutting-edge technologies:
Deep Learning Networks: Multi-layered neural networks trained on vast datasets of plant images enable incredibly precise identification and analysis.
Edge Computing: Processing occurs locally on the device, providing instant results without requiring internet connectivity.
Continuous Learning: Systems improve over time, learning from user interactions and expanding their knowledge base.
Overcoming Traditional Challenges
Early plant recognition systems struggled with variable lighting conditions, different growth stages, and similar-looking species. Modern systems address these challenges through:
Adaptive Lighting Compensation: AI algorithms automatically adjust for different lighting conditions, from full sunlight to low-light indoor environments.
Multi-Stage Recognition: Systems trained to identify plants at various growth stages, from seedling to mature plant.
Contextual Analysis: Considering factors like location, season, and growing conditions to improve identification accuracy.
Integration with Growing Systems
The real power of computer vision emerges when integrated with other growing technologies:
Automated Irrigation: Visual plant health assessment triggers targeted watering schedules based on actual plant needs rather than preset timers.
Nutrient Management: Color analysis reveals nutrient deficiencies, enabling precise fertilizer application.
Pest and Disease Management: Early detection allows for targeted interventions, reducing the need for broad-spectrum treatments.
Looking Forward: The Future of Plant Recognition
As the technology continues to evolve, we can expect even more sophisticated capabilities:
Predictive Analytics: Systems will predict plant needs and potential problems days or weeks in advance.
Yield Optimization: AI will optimize growing conditions for maximum harvest quality and quantity.
Personalized Growing Recommendations: Systems will learn individual growing styles and preferences, providing customized advice.
Getting Started with Computer Vision Growing
For growers interested in incorporating this technology:
Start Simple: Begin with basic plant identification features before moving to advanced health monitoring.
Invest in Quality Hardware: Good cameras and sensors are essential for accurate analysis.
Embrace the Learning Curve: Like any new technology, there’s an adjustment period as you learn to interpret and act on the data provided.
Computer vision is transforming agriculture from guesswork to precision science. For home growers, this means healthier plants, better harvests, and a deeper understanding of the growing process. As this technology becomes more accessible and affordable, it’s positioned to revolutionize how we approach plant care at every scale.
The future of growing is visual, intelligent, and incredibly exciting. Whether you’re managing a backyard garden or a commercial greenhouse operation, computer vision technology offers tools that were unimaginable just a few years ago. The revolution is here – and it’s time to see your plants in a whole new light.

Harnessing AI for a New Era in Agriculture
Artificial Intelligence (AI) is transforming agriculture at every level, offering tools to make farming more efficient, sustainable, and affordable. At Blooming Crescent, we view AI not as a futuristic luxury, but as a present-day necessity to meet global food demands while regenerating our land and communities.
How AI Enhances Agriculture
AI applications in agriculture include real-time crop monitoring, predictive weather and soil analytics, autonomous farm machinery, and early disease detection. Using machine learning models trained on years of agricultural data, farmers can make decisions that maximize yield while minimizing inputs like water, fertilizer, and energy.
For instance, AI-powered computer vision systems mounted on drones or stationary cameras can scan crops and detect pests, stress, or nutrient deficiencies long before the human eye can. AI-driven analytics can then recommend targeted responses, saving entire fields from ruin and reducing reliance on harmful chemicals.
Our Implementation Strategy
At Blooming Crescent, we’re building modular AI systems integrated with renewable-powered vertical farms. These systems include:
- Sensor Networks: Real-time monitoring of temperature, humidity, CO2, and light levels to optimize plant health.
- AI Crop Models: Machine learning models that predict growth patterns and dynamically adjust nutrient and water delivery.
- Computer Vision: Identifying disease or growth anomalies in real time to trigger automated interventions.
- Open-Source Interfaces: Empowering farmers and communities to customize, contribute, and scale the tech for local needs.
These components work together to form an adaptive, closed-loop farming environment that learns over time.
Cost Reduction Examples
AI doesn’t just improve outcomes; it cuts costs significantly:
- Labor Efficiency: Automated monitoring and alerts reduce the need for manual inspection by 60%.
- Resource Optimization: Smart irrigation and nutrient dosing reduce water and fertilizer use by 30-50%.
- Crop Loss Prevention: Early detection of disease and pests prevents up to 40% of yield losses.
- Modular Design: Smaller farms can adopt only the components they need, lowering the barrier to entry.
By deploying these systems in underserved rural and urban areas, we aim to democratize access to advanced agriculture and help communities grow more with less.
Looking Ahead
AI is not replacing farmers—it’s empowering them with superhuman insight and foresight. With continued collaboration, training, and open innovation, Blooming Crescent is cultivating a future where agriculture is smarter, greener, and more equitable for all.
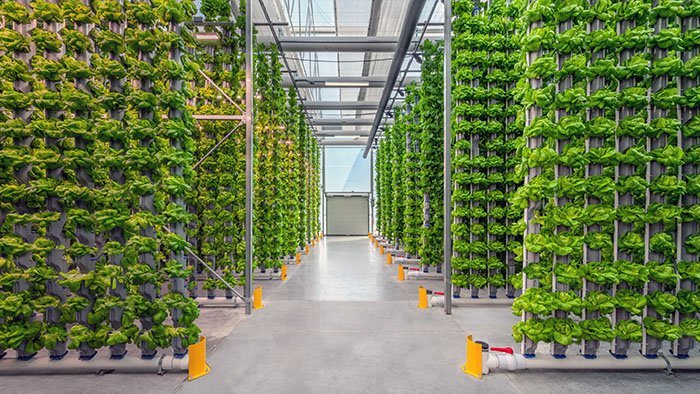
Vertical Farming 2.0: Scaling Up in 2025
Vertical farming has evolved dramatically, moving beyond niche markets to become a vital component of the global food supply chain. By 2025, advancements in automation, robotics, and renewable energy integration have made vertical farming more scalable and cost-effective. This blog will examine the key innovations driving this growth and the role of vertical farming in addressing food security challenges, particularly in urban environments.
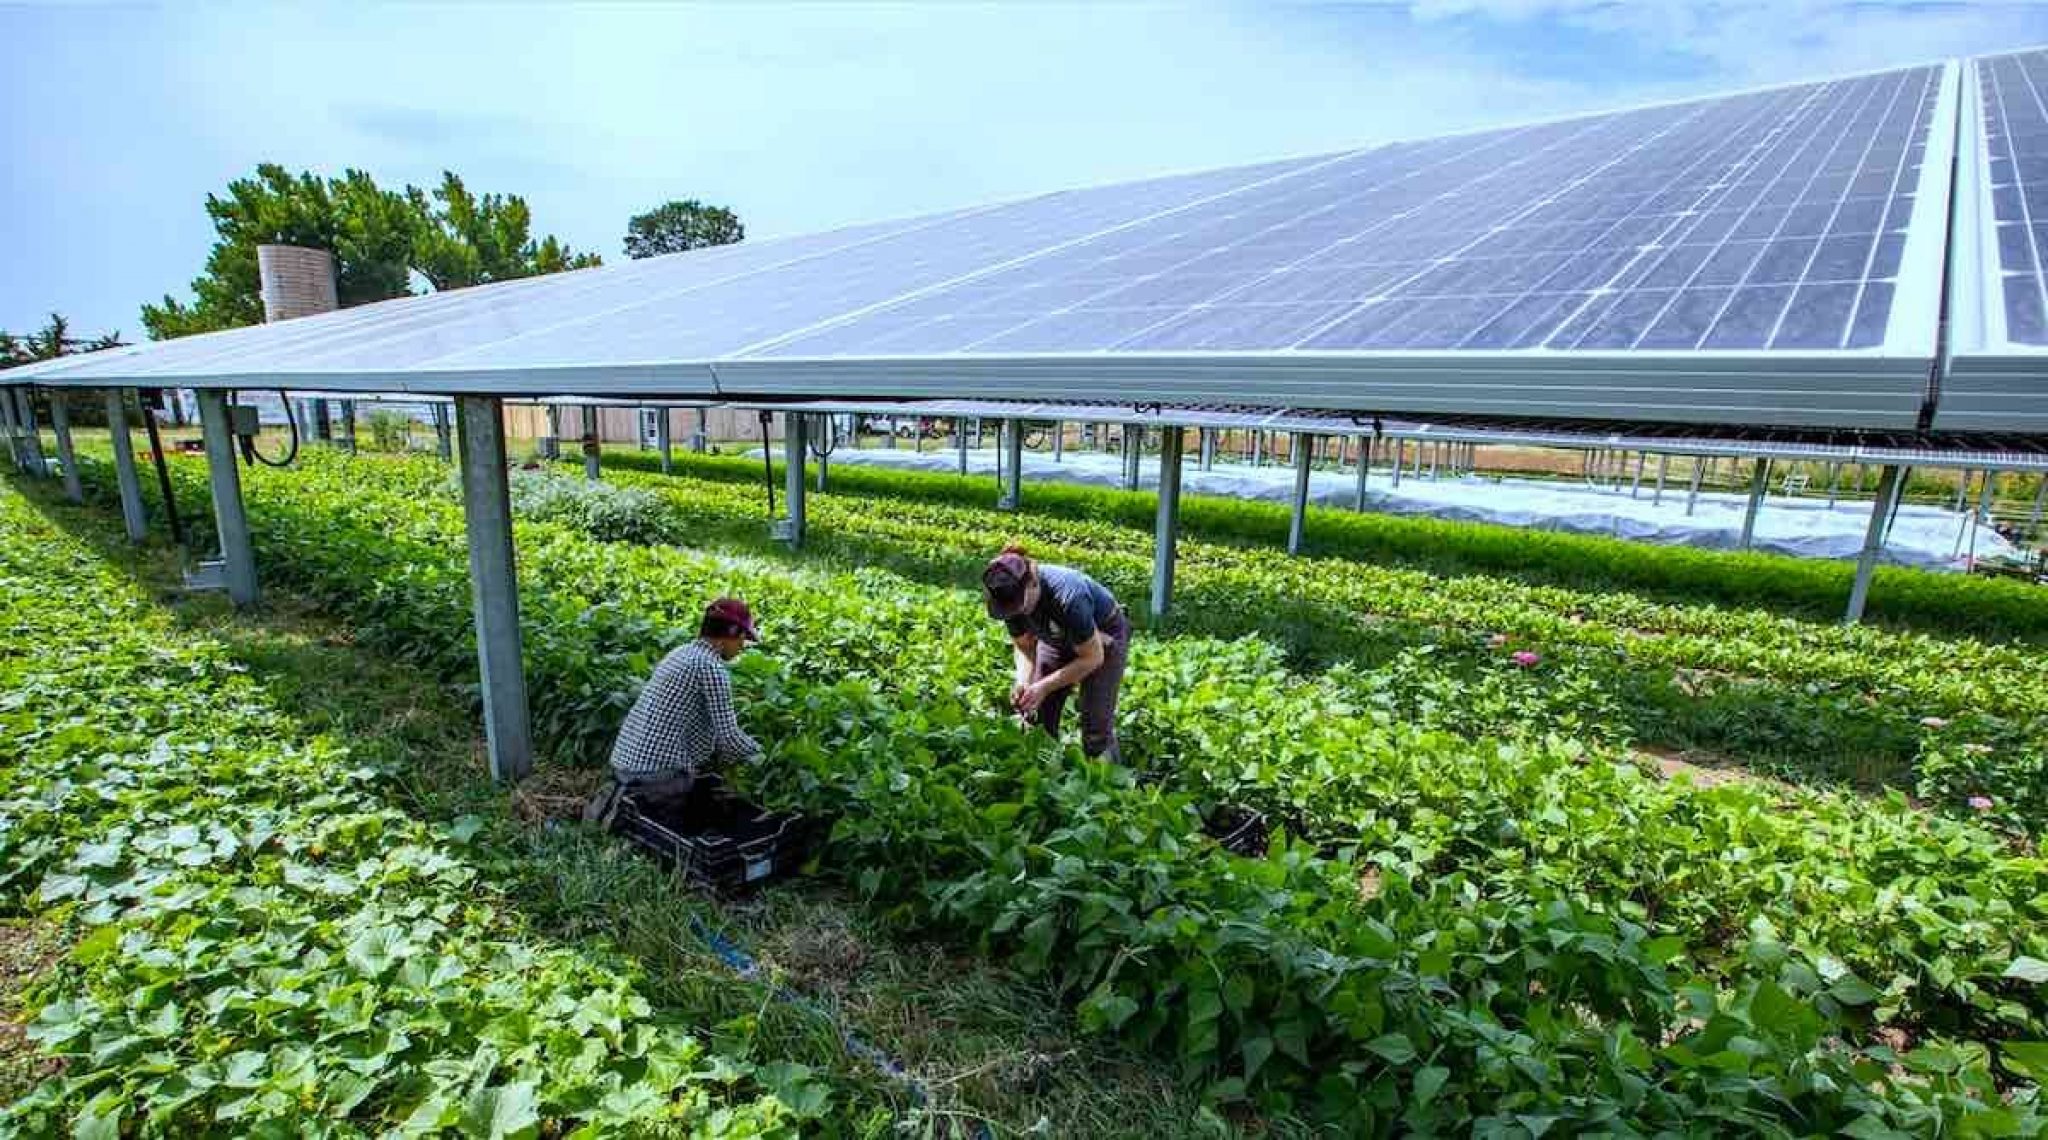
2025 Agriculture: How Renewable Energy Is Shaping the Future of Farming
Renewable energy is no longer a luxury; it’s a necessity for modern farming. In 2025, more farms are adopting solar panels, wind turbines, and biogas systems to power operations. This shift not only reduces greenhouse gas emissions but also cuts costs, enabling farmers to allocate resources more effectively. This blog post will highlight the most innovative renewable energy solutions in farming today and their implications for smallholder and industrial farms alike.
Affordable Housing in 2025: The Role of 3D Printing
Affordable housing has always been a challenge, but 2025 marks a turning point with the mainstream adoption of 3D printing technology. This groundbreaking approach allows for faster construction, reduced costs, and customized designs, all while minimizing material waste. This blog will delve into how 3D printing is revolutionizing affordable housing projects globally, from rural communities to urban centers. It will also cover the environmental benefits and challenges of scaling 3D printing in construction.

The Next Frontier in AgriTech: AI-Driven Predictive Models
In 2025, the agricultural landscape is being reshaped by artificial intelligence (AI), driving predictive models that help farmers make proactive decisions. From forecasting weather patterns to predicting crop yields, AI algorithms are transforming how we approach food production. Farmers can now rely on AI to analyze vast amounts of data from IoT devices, drones, and satellite imagery, enabling a level of precision that was unimaginable just a few years ago. In this blog post, we’ll explore the top AI tools in agriculture and discuss their impact on sustainability, cost reduction, and food security.